Engineering
FFmpeg Rendering Pipeline: Queue, Encoder, Build vs Buy
Learn what a production FFmpeg rendering pipeline needs beyond one command, then compare each operating layer with a managed Zvid workflow.
By Mina RamzyPublished Updated
FFmpeg Rendering Pipeline: Queue, Encoder, Build vs Buy
An FFmpeg rendering pipeline is not an FFmpeg command wrapped in an HTTP route. The command is one stage inside a system that validates requests, resolves media, plans timelines, schedules compute, limits concurrency, captures progress, stores outputs, handles retries, and tells another application what happened.
That distinction matters because a proof of concept usually exercises the happy path: local files, known codecs, one render, and a developer watching the terminal. Production adds remote URLs, corrupt inputs, duplicate requests, large batches, expired credentials, worker crashes, partial outputs, and customers who need a reliable status.
This guide maps the complete pipeline. It uses FFmpeg's official command-line, filter, and ffprobe documentation for the media layer, then compares that self-operated architecture with the managed workflow documented by Zvid.
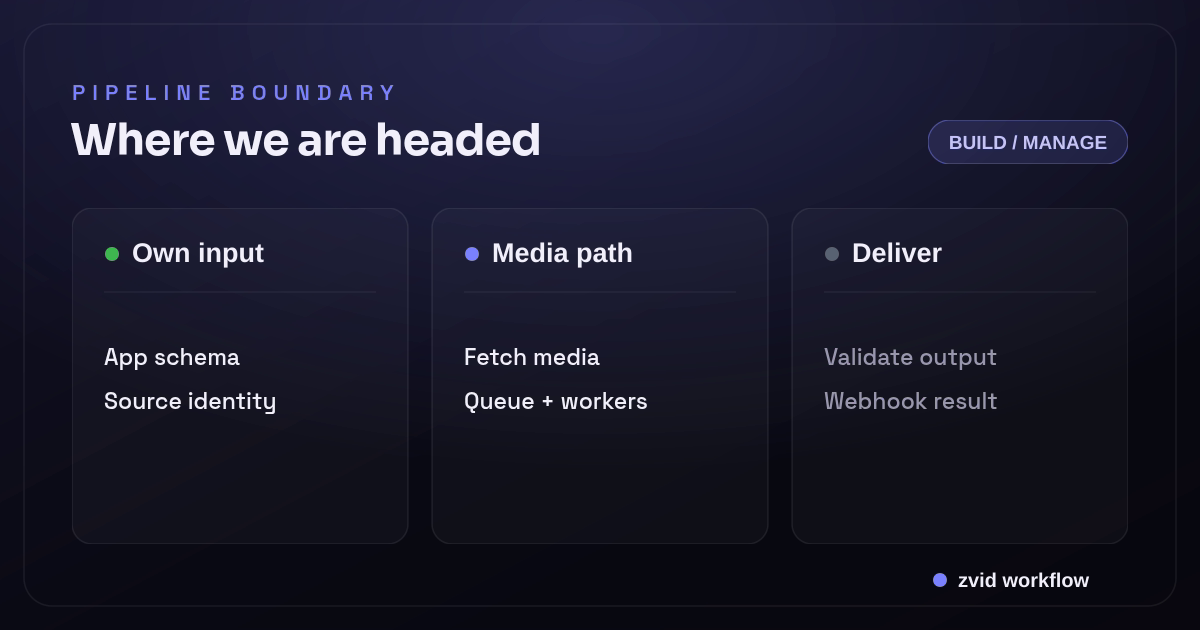
Own input, Media path, and Deliver form one reviewable Zvid workflow.
The production pipeline in one view
A dependable system has at least nine boundaries:
- Request contract — accept an application-specific payload and reject invalid data.
- Media resolution — authorize, download, inspect, and normalize inputs.
- Render planning — convert business data into an exact timeline and filter graph.
- Job persistence — create a durable job before work starts.
- Queue and admission control — limit concurrency by CPU, memory, GPU, and tenant.
- Render execution — run FFmpeg in an isolated worker and capture progress.
- Output validation and storage — verify the file, publish it atomically, and retain metadata.
- Delivery — emit an idempotent completion event or expose a status API.
- Operations — measure latency, errors, capacity, cost, and quality regressions.
If you own an FFmpeg pipeline, you own the behavior between all nine stages.
1. Define an application input contract
Do not let callers submit shell arguments or arbitrary filter graphs unless building a low-level media platform is the explicit product. Most applications need a narrow contract such as this:
{
  "requestId": "launch-2026-07-16-0042",
  "template": "product-launch-v3",
  "output": {
    "width": 1080,
    "height": 1920,
    "fps": 30,
    "format": "mp4"
  },
  "data": {
    "title": "Meet Orbit",
    "tagline": "Turn calls into action",
    "heroVideoUrl": "https://media.example.com/orbit-demo.mp4",
    "logoUrl": "https://media.example.com/orbit-logo.png",
    "showCta": true
  }
}
Validate syntax, types, allowed dimensions, string lengths, URL schemes, array limits, and business rules before reserving render capacity. The requestId should be unique or idempotent so a network retry cannot accidentally create two expensive jobs.
Keep this application schema separate from FFmpeg. It should describe what the caller is allowed to ask for, not implementation details such as filter_complex labels.
2. Resolve and inspect media safely
Remote media is untrusted input. A media resolver typically needs to:
- Allow only
httpandhttpsURLs. - Block loopback, link-local, private-network, and cloud metadata targets to prevent SSRF.
- Enforce redirect, download-size, duration, and timeout limits.
- Stream into a job-scoped workspace rather than memory.
- Verify the detected media type instead of trusting the extension or response header.
- Inspect streams with
ffprobebefore building the render plan. - Record a checksum and normalized metadata for reproducibility.
A narrow ffprobe command can return machine-readable stream information:
ffprobe \
  -v error \
  -show_entries stream=index,codec_type,codec_name,width,height,r_frame_rate,duration \
  -show_entries format=duration,size \
  -of json \
  input.mp4
The application should parse that JSON and decide whether to accept, transcode, trim, or reject the source. Do not scrape human-formatted terminal output.
3. Compile a deterministic render plan
Business data rarely maps directly to one FFmpeg command. A planner must decide:
- Scene start and end times
- Video trims and playback speed
- Scale, crop, padding, and safe areas
- Text layout and font files
- Overlay order and alpha behavior
- Audio trims, fades, loudness, and mixing
- Transitions between scenes
- Caption timing and burn-in style
- Output codec, pixel format, frame rate, and bitrate policy
Represent the plan as data first. That gives you something to validate, log, test, and replay before converting it into command arguments.
{
  "duration": 8,
  "tracks": [
    {
      "kind": "video",
      "source": "media/hero.mp4",
      "start": 0,
      "end": 8,
      "fit": "cover"
    },
    {
      "kind": "image",
      "source": "media/logo.png",
      "start": 0.4,
      "end": 7.6,
      "box": {"x": 72, "y": 90, "width": 220, "height": 80}
    },
    {
      "kind": "text",
      "value": "Meet Orbit",
      "start": 0.6,
      "end": 3.2,
      "style": "hero-title"
    }
  ]
}
Generate FFmpeg arguments as an array passed directly to the process launcher. Never concatenate user-controlled values into a shell command. Escape text and filter values according to FFmpeg's parsing rules, which are different from shell escaping.
4. Persist the job before queueing it
The database record is the source of truth, not an in-memory queue message. A useful state model is:
accepted -> preparing -> queued -> rendering -> validating -> completed
                                              \-> failed
Store at least:
- Internal job ID and caller request ID
- Tenant and template version
- Sanitized input data or a durable reference to it
- Render-plan version and worker build version
- Current state, attempt count, and timestamps
- Failure stage, machine-readable code, and safe human message
- Output URL, checksum, size, duration, resolution, and format
Write the job transactionally before publishing the queue message. An outbox pattern prevents a database success followed by a queue failure from leaving an accepted job that never runs.
5. Queue by resource, not only by job count
Two renders can have radically different resource profiles. A ten-second 720p slide show and a five-minute 4K composition should not consume the same admission token.
Classify work using expected pixels, duration, frame rate, codec, element count, and whether hardware acceleration is available. Apply:
- Global and per-tenant concurrency limits
- Separate queues for short, normal, and heavy jobs
- Maximum wall-clock runtime
- Queue visibility timeouts longer than the worker heartbeat interval
- Backpressure when storage, database, or downstream delivery is degraded
- Fair scheduling so one large batch cannot starve interactive work
Retries should be stage-aware. A transient media-host timeout may be retryable; an unsupported codec or invalid timeline is not. Retry from a clean workspace unless the stage was designed for safe checkpointing.
6. Isolate and monitor FFmpeg workers
Run each job in an isolated directory or container with bounded CPU, memory, disk, network, and process lifetime. Pin the FFmpeg build so the same input does not silently change behavior after a worker image update.
FFmpeg can emit progress as key-value records:
ffmpeg \
  -progress pipe:1 \
  -nostats \
  -i media/hero.mp4 \
  -filter_complex "[0:v]scale=1080:1920:force_original_aspect_ratio=increase,crop=1080:1920[v]" \
  -map "[v]" \
  -map 0:a? \
  -c:v libx264 \
  -pix_fmt yuv420p \
  -movflags +faststart \
  output.tmp.mp4
Parse progress separately from diagnostic logs. Persist heartbeats and coarse progress, but avoid writing every frame update to the primary database. Capture bounded stderr for diagnosis and move full logs to object storage if needed.
Terminate the entire process group on timeout or cancellation. Killing only the parent process can leave encoders or subprocesses consuming resources.
7. Validate before publishing the output
A zero FFmpeg exit code is necessary, not sufficient. Before marking a job complete:
- Confirm the temporary file exists and is non-empty.
- Run
ffprobeagainst the output. - Verify duration, stream count, dimensions, frame rate, codec, and pixel format against the plan.
- Decode representative frames or the whole asset for critical workflows.
- Check that audio is present when required and absent when prohibited.
- Upload to a temporary object key.
- Publish atomically by copying or promoting it to the final key.
- Store checksum and output metadata with the completed state.
Generate thumbnails or poster frames in this stage, not as an untracked side effect. Treat them as related artifacts with their own metadata.
8. Deliver completion idempotently
Your status endpoint should remain authoritative even if webhook delivery fails. A robust event contains a stable event ID, job ID, terminal status, output metadata or error code, and event timestamp.
Sign the exact bytes sent, include a timestamp, retry non-2xx responses with backoff, and keep a delivery log. The receiver should deduplicate by event ID or job-plus-terminal-state before triggering downstream work.
Never send a success event before the final object is readable. Eventual consistency between status and storage creates some of the most frustrating pipeline failures.
9. Operate the system with stage-level signals
One “render failed” counter cannot tell you what to fix. Measure:
- Acceptance and validation failure rates
- Media fetch latency and failure by host
- Queue wait and render time by workload class
- FFmpeg exit code and normalized failure category
- Worker CPU, memory, disk, and termination reason
- Output-validation failure rate
- Webhook delivery success, attempts, and age
- End-to-end latency from accepted to completed
- Render attempts and compute per successful output
Keep a small set of golden projects and render them after worker, font, browser, codec, or base-image changes. Compare metadata and representative frames so a technically valid but visually broken release does not reach production.
Security and abuse controls belong in the design
Video rendering combines remote fetches, complex parsers, large files, and expensive compute. Plan for:
- API authentication, tenant authorization, and rate limits
- Strict input limits before queueing
- SSRF and redirect defenses
- Patched, pinned media tooling
- Sandboxed workers with minimal filesystem and network access
- Secrets injected at runtime, never embedded in jobs or logs
- Signed output URLs when assets are private
- Retention policies for inputs, workspaces, outputs, and logs
- Abuse monitoring for compute and storage exhaustion
These controls are part of the product, not optional hardening after launch.
Where Zvid changes the responsibility boundary
Zvid does not make the application workflow disappear. Your service should still validate its business input, maintain idempotency, authorize callers, map source records, and reconcile results. It moves the media-specific execution layers behind a managed API.
| Pipeline layer | Self-operated FFmpeg | Zvid-managed workflow |
|---|---|---|
| Application input | Your schema and code | Your schema and code |
| Creative plan | Your planner and filter graph | Zvid project JSON or stored template |
| Visual authoring | Custom tooling or code | Zvid canvas and timeline editor |
| Media validation | Your fetcher, probes, and limits | API validation and managed media resolution; you still control source quality |
| Queue and workers | Your infrastructure | Managed render job |
| FFmpeg/browser details | Your implementation | Internal to Zvid |
| Output | Your validation and object storage | Hosted result URL; copy it if your retention policy requires |
| Batch fan-out | Your scheduler | Native bulk endpoint with item-level errors |
| Completion | Your status API and webhook system | Job endpoint, per-request callback, or registered signed webhook |
| Operations | Your dashboards and incident response | Zvid dashboard plus your application-level monitoring |
The Zvid request can use a stored template rather than expose media implementation details:
{
  "template": "tpl_xxxxxxxxxxxxxxxxxxxx",
  "variables": {
    "title": "Meet Orbit",
    "tagline": "Turn calls into action",
    "heroVideoUrl": "https://media.example.com/orbit-demo.mp4",
    "logoUrl": "https://media.example.com/orbit-logo.png",
    "showCta": true
  },
  "overrides": {
    "name": "launch-2026-07-16-0042"
  },
  "webhookUrl": "https://app.example.com/hooks/zvid"
}
Zvid validates the resolved project before queueing. For a data set, the bulk endpoint accepts one template plus per-item variable sets and returns item-level validation errors without discarding valid rows. Registered webhooks add signed terminal events, retries, and a delivery log.
A low-risk migration path
You do not need to replace a working pipeline in one release.
- Select one high-volume, structurally stable template.
- Document the current application input independently from FFmpeg arguments.
- Rebuild the creative in the Zvid Editor or as JSON.
- Define template variables that match the application contract.
- Preview boundary cases: long text, missing optional media, largest array, and every condition.
- Shadow-render a representative sample in both pipelines.
- Compare visual output, end-to-end latency, failures, and operator effort.
- Route a small production percentage to Zvid with job-level reconciliation.
- Keep rollback at the application routing layer until quality and reliability targets hold.
This method evaluates the whole system while preserving a safe fallback.
A compact FFmpeg format and stream glossary
FFmpeg command-line options are easier to operate when each one maps to a pipeline decision. In ffmpeg -i input.mp4, -i declares an input file. The demuxer discovers the video stream and audio stream; decoders turn them into video frames and audio samples; a video filter or audio filter transforms those decoded streams; encoders compress them; and the muxer writes the chosen output format.
A simplified diagnostic command might look like this:
ffmpeg -i input.mp4 -map 0:v:0 -map 0:a:0 \
  -c:v libx264 -crf 20 -pix_fmt yuv420p \
  -c:a aac -f mp4 output.mp4
The flags are not a complete production preset. They expose decisions your service must version: encoder, codec, channel layout, pixel format, output container, frame rate, and quality target. ffplay can help a developer inspect an output locally, but first-frame checks, duration checks, and decode tests should run automatically in the worker or QA stage. Keep the exact FFmpeg build and command beside each result so a later regression can be reproduced against the same inputs.
For automated verification, add commands that decode video and audio without writing a deliverable. ffmpeg -v error -i output.mp4 -f null - catches many stream errors, while ffprobe can return machine-readable duration, codec, dimensions, and pixel format. The literal flags -f null and -pix_fmt yuv420p are not universal requirements; they are examples of how command-line choices become versioned pipeline policy. Link the pinned FFmpeg documentation beside that policy.
Real Zvid example: managed API explainer render
The embedded video is rendered by Zvid from the saas-api-explainer example. It demonstrates the output of the managed side of the architecture: a real template-derived project is validated, queued, rendered, and returned as a video job—not represented by an AI-generated mockup.
A real Zvid render adapted from the published saas-api-explainer example for this workflow.
The companion pipeline map above is also rendered as an image by Zvid. Together, the two assets prove both sides of the product: still-image generation for the architecture visual and video rendering for the working example.
Frequently asked questions
Is FFmpeg enough for a video rendering API?
FFmpeg is the core media engine, but a production API also needs request validation, media security, timeline planning, durable jobs, queueing, isolated workers, output validation, storage, delivery, and observability.
Should every remote file be transcoded first?
Not automatically. Probe the source and normalize only when the output plan, compatibility policy, or reliability requirements demand it. Unnecessary intermediate transcodes increase latency and quality loss.
Can Zvid replace application-level validation?
No. Zvid validates the render project and enforces platform limits. Your application should still validate its own business contract, authorize the request, and preserve source-record identity.
When should a team keep its own FFmpeg pipeline?
Keep it when media execution is a strategic capability, the project needs unsupported low-level behavior, or the team requires infrastructure control that justifies its operating cost. Use a managed service when the differentiated work is the application and creative system rather than render infrastructure.
Build only the layers you intend to operate
Owning an FFmpeg pipeline can be the right engineering decision. Make it deliberately, with every production layer in the estimate. The filter graph is rarely the dominant long-term burden; queues, unsafe media, failure recovery, output delivery, capacity, and regressions are.
Zvid offers a different boundary: keep the business contract and application workflow, then express the creative as editor-compatible JSON or a stored template and delegate validation, queueing, render execution, bulk fan-out, and delivery mechanics. Test that boundary with one difficult real project before choosing it.