Tutorials
Shopify Product Video Ads
Create Shopify product video ads with n8n and Zvid. Preview creative variants, render the batch and review the results, or use the complete Node.js script.
 By Mina RamzyPublished
A product can support several useful ads: one introduces it, another leads with a benefit, and a third puts the price first. Making those versions by hand means repeating the same image placement, text changes and exports.
This Shopify product video ads workflow turns existing photos, descriptions and prices into separate video concepts with n8n and Zvid. Preview one concept, render the selected batch, then review the MP4s or pass their details to an asset store or social scheduler. The main walkthrough uses n8n; a complete Node.js alternative follows.
See what the workflow creates
$34 · square product video ad
Download the sample MP4 ↓
One product, several ways to introduce it
A product-first concept introduces the tee. A benefit-first version changes the opening and supporting copy using its Shopify description. An offer-first version leads with the price, or with a genuine saving when the product has a higher compare-at price.
Each concept becomes its own MP4, with its product and creative angle attached to the result.
The demonstration uses an ivory tee priced at $34. The design combines a product introduction, a closer look, benefit cards, an offer scene and a branded end card. It uses up to three product images, repeating an available image when there are fewer. The supplied square design runs approximately 18.9 seconds; blank musicUrl produces a silent video.
1. Get the workflow and prepare your accounts
Open Create Shopify product video ads with Zvid on n8n, or its Zvid workflow page. Use the maintained JSON below for this walkthrough. The official listing uses some longer node labels; the written steps here match the maintained download.
Watch the complete walkthrough
See the full n8n workflow
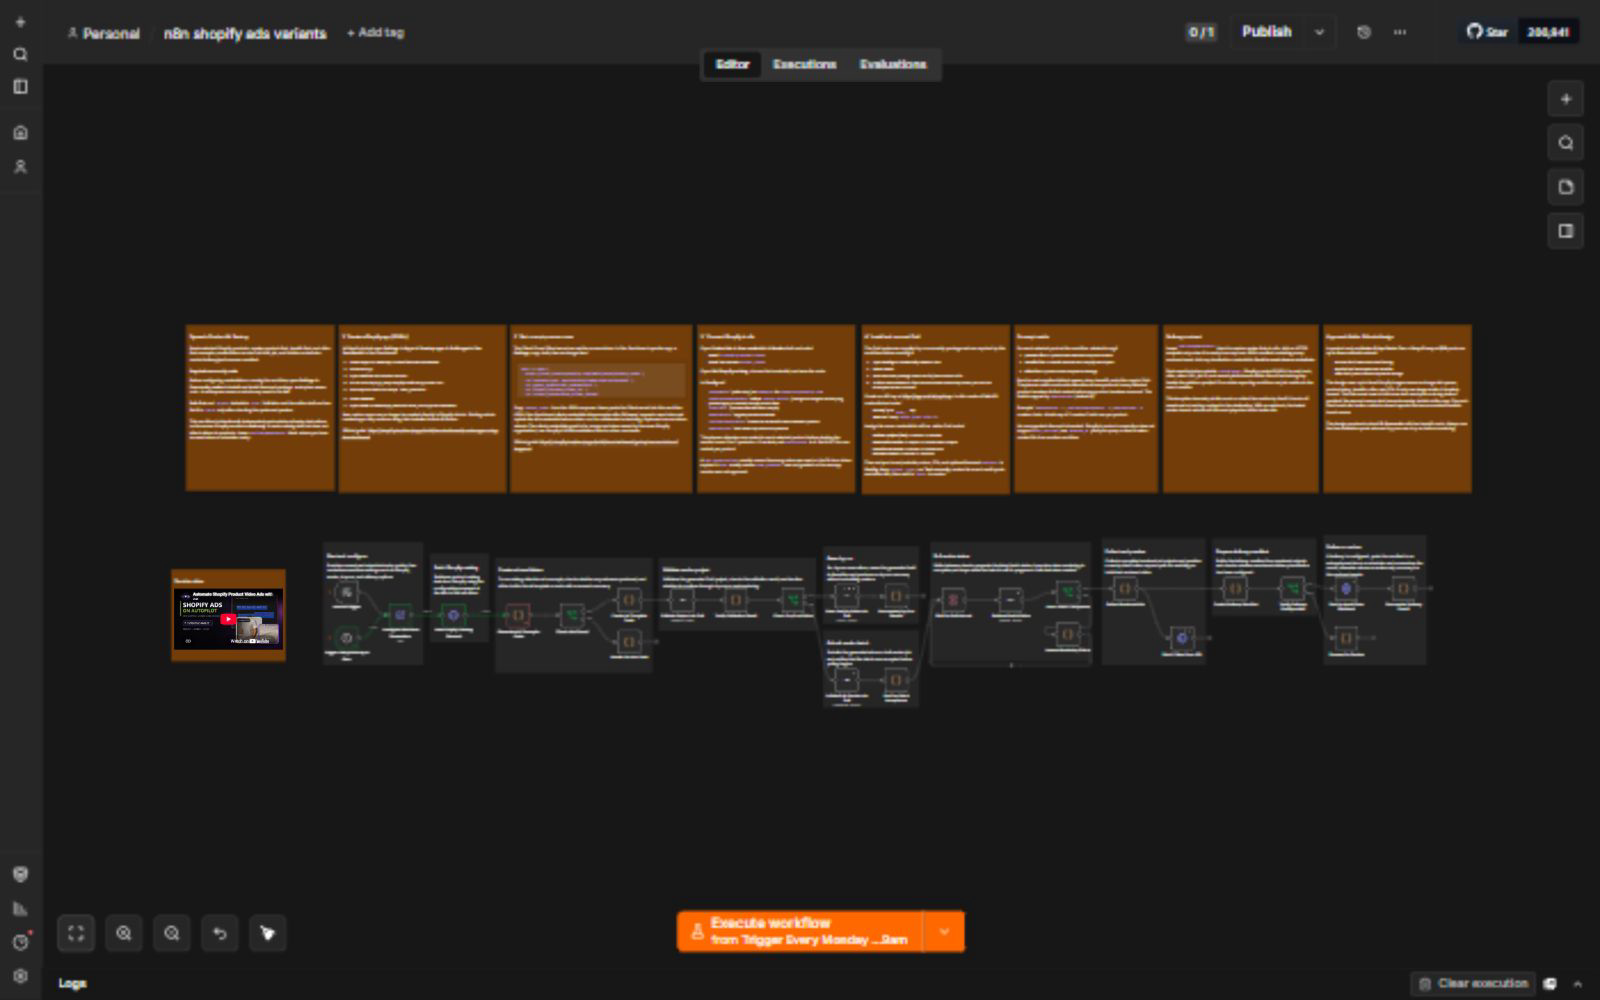
You need an n8n workspace, a Zvid account and API key, and a Shopify store with an installed app allowed to read products. Each selected product needs a title, a priced variant and a public product image. Prepare one product for a small test and enough Zvid credits when you reach rendering.
The workflow returns video assets. Connecting an advertising account, choosing campaign budgets and collecting performance results happen in your advertising tools.
2. Install, import and connect credentials
Install the Zvid node
In n8n, open Settings → Community nodes → Install and install @zvid/n8n-nodes-zvid. A workspace owner or administrator may need to do this; the Zvid n8n integration guide covers installation. Create a workflow, choose Import from file from its menu and load the JSON. Leave the workflow inactive during setup.
Create a key at app.zvid.io/api-keys. Create a Zvid API credential in n8n, paste the complete key into API Key, and keep https://api.zvid.io as the base URL. Select that credential in Validate project (free), Save draft to editor, Submit bulk render and Get batch status.
Get a Shopify Admin API access token
For an app and store in your own Shopify organization:
- Open Shopify's Dev Dashboard, select Apps → Create app → Start from Dev Dashboard, and name the app.
- Create a version with Shopify's default app-home URL for this API-only setup. Add
read_products, release the version, then install the app on your store and approve access. The Dev Dashboard app guide shows these screens. - Open the app's settings. Copy its Client ID and Client secret into your private API client, then exchange them using the request below. Neither value is itself an access token.
curl -X POST "https://YOUR_STORE.myshopify.com/admin/oauth/access_token" \
  -H "Content-Type: application/x-www-form-urlencoded" \
  -d "grant_type=client_credentials" \
  -d "client_id=YOUR_CLIENT_ID" \
  -d "client_secret=YOUR_CLIENT_SECRET"
- Copy the returned
access_token. Create an n8n Header Auth credential with header nameX-Shopify-Access-Tokenand that token as its value. Assign it to Get Shopify catalog. Keep the token in the credential, outside the workflow JSON.
Handle expiration before scheduling. These client-credentials tokens last about 24 hours; read expires_in in the response. The supplied workflow does not renew them. Request a fresh token before a later manual run and add secure renewal before activating a schedule. This lifetime applies to this authentication method, not every Shopify token. For another merchant's store, use the appropriate Shopify app authentication flow. See the client-credentials guide and token lifetimes.
Set shopDomain in Config to the store prefix, such as example for example.myshopify.com. Execute Get Shopify catalog after Config. Look for body.data.products.nodes without a GraphQL error. For a 401, check or renew the token. For a scope error, check the installed app's approved read_products access.
3. Choose one product for the first run
Use these controls in Config:
| Setting | Shipped value | First-run value | Meaning |
|---|---|---|---|
shopifyProductQuery |
status:active |
status:active tag:video-test |
Add the video-test tag to your chosen product. |
scanLimit |
50 |
50 |
Matching records read in one request. |
maxProducts |
3 |
1 |
Eligible products selected. |
variantsPerProduct |
3 |
1 |
Creative angles requested per product. |
maxTotalAds |
5 |
1 |
Final limit across the whole batch. |
dryRun |
true |
true |
Validate and save the first editor draft. |
deliveryWebhookUrl |
empty | empty | Keep finished assets in the review branch. |
Replace brandName, website and ctaText with your values. Keep resolution: "instagram-post" for the supplied 1080 × 1080 layout. Changing resolution alone does not redesign its fixed positions for a vertical video.
For the tee above, the title fills the opening headline, $34 fills the price and its photos fill the image positions. The angle determines which title, description or price message comes first. Savings are shown only when Shopify supplies a higher compare-at price.
4. Preview the ad and check the estimate
Run Test manually with dryRun: true. Create ad concepts lists the selected products and angles. Validate project (free) checks the first concept, and Check validation exposes warnings and the quote. Zvid's validation and estimates guide explains these results. Save draft to editor creates a preview; Dry run summary returns its editorLink.
Open the link, play the timeline and check the crop, title, text contrast, price and end card. This is an editor preview, not a completed MP4.
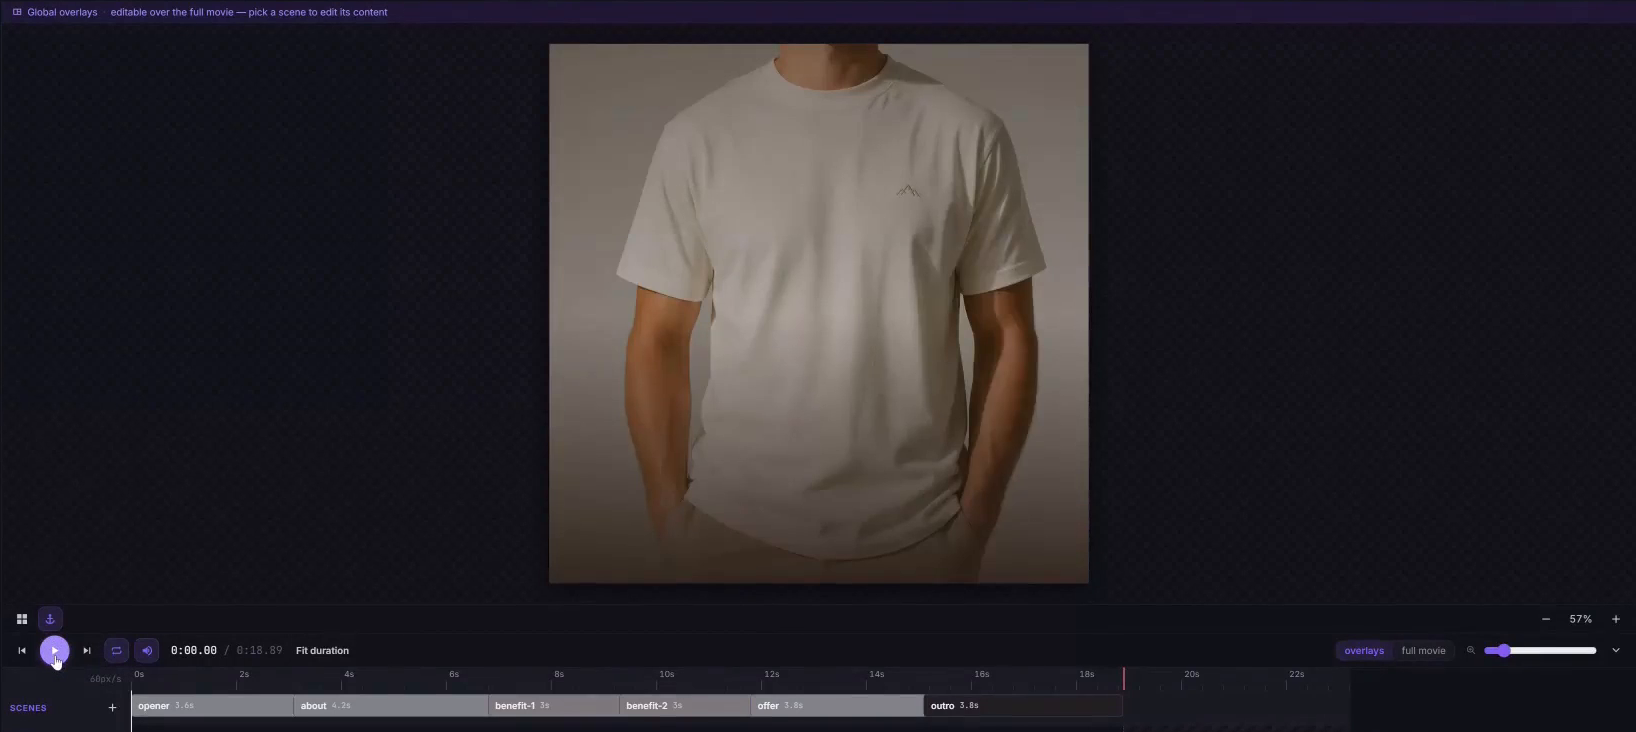
The n8n summary's totalCredits multiplies the first ad's quote by the planned count. It estimates this shared design; it is not a billing record or independent validation of every item. Read warnings and skipped before continuing. If editorDraftError reports Project limit reached, remove an unneeded saved project and repeat the dry run.
5. Render, watch and save
When the preview and quote are right, set dryRun to false and execute once. Submit bulk render creates the paid batch. Check batch accepted records its bulkId and job mapping, then Get batch status checks progress after each Wait.
Collect rendered ads returns successful videos and failures. Open ▶ Watch video, select an output item, and use n8n's binary preview to watch or download that MP4. Review each angle before using it.
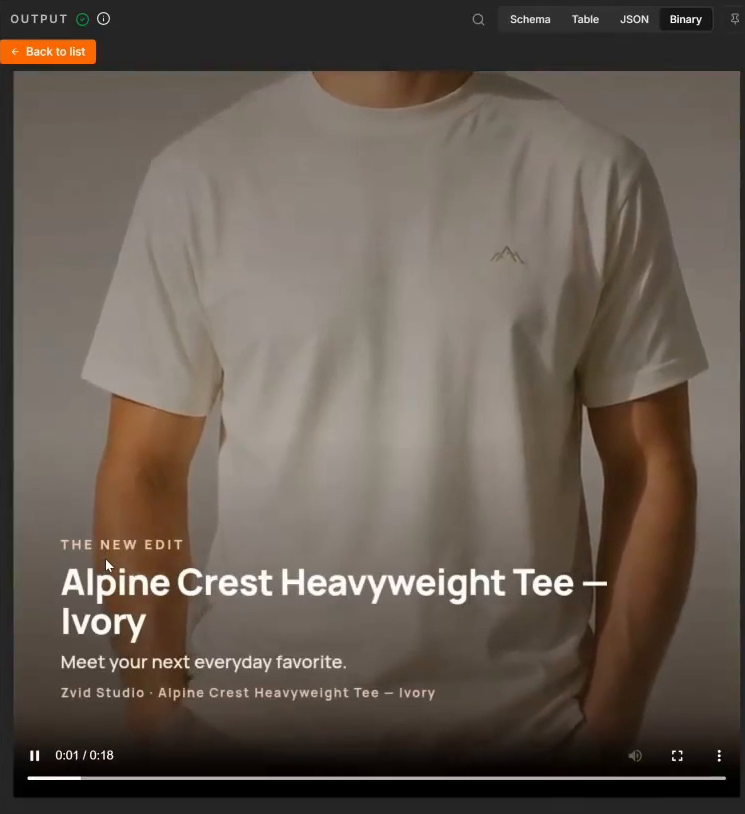
Save the bulk ID and product-to-creative mapping with your campaign records. Download finished files before their availability ends. The credits and limits guide explains retention and outputExpiresAt.
If polling times out, queued renders continue. Check the existing batch in app.zvid.io before executing again: a new full run can create another paid batch. For partial failure, keep the successful videos and investigate the failed items.
6. Review the assets or connect their destination
With deliveryWebhookUrl empty, Rendered for review returns a manifest: a structured list of completed assets. Entries include the product, storefront URL, creative angle, trackingKey, video URL and job ID.
Upload the reviewed MP4 to your advertising or scheduling tool. Put the shop link in its destination or caption field. The website printed inside a video is not clickable.
For automatic handoff, add an HTTPS endpoint to deliveryWebhookUrl and configure its authentication in Send to asset store or scheduler. Your receiving service must accept the manifest, save the media and decide whether to schedule or publish. Confirm the asset arrived before enabling unattended delivery. If handoff fails after rendering, resend the saved manifest instead of rendering again.
The manifest's performance fields start at zero with status: "not_published". They are placeholders for later reporting. Store the trackingKey beside the destination's post or ad ID, then use a separate reporting integration to join actual results back to the concept.
Customize, then increase the batch
Change your brand fields, colors and product-first hookTemplates before increasing volume. Keep descriptions accurate and short enough for the design. Benefit-first copy comes from your product description; the workflow does not invent or verify product claims.
For two products and two concepts each, use maxProducts: 2, variantsPerProduct: 2, maxTotalAds: 4. Allocation is round-robin: each selected product receives one concept before the second round. A total cap of two produces two videos overall.
Selection reads recently updated matching records from one Shopify page. It is not a complete store scan or a bestseller ranking. Use tags to choose a campaign group; inspect skipped products for missing images or prices.
Before activating Every Monday at 9am, confirm the workflow timezone, token renewal and batch size. The template does not remember earlier campaigns, so repeated runs can produce the same concepts again. Add a history check if you only want new or changed products. Price or photo changes require a new reviewed render to update the video.
Costs and practical limits
Validation and the editor preview do not reserve render credits. Rendering does. The included square sample was quoted at 19 credits. Four unchanged videos would therefore be approximately 76 credits. The batch figure is illustrative, not a billing record; use your current quote after editing duration or resolution. Zvid credits and plans documents the formula.
Account batch, dimension, request-rate and saved-project limits still apply. Bulk rendering can accept some items while rejecting others. Inspect both jobs and errors. There is no built-in credit ceiling in the n8n Config: keep maxTotalAds small, review the estimate and control when you disable dry run.
Shopify access, n8n hosting, music licensing and the destination service are separate requirements. This workflow uses existing images and text; it does not require AI image or voice generation.
Prefer Node.js?
The companion runs the same bundled n8n planner and template builder with the official @zvid/sdk. It validates every selected variant, submits one batch and saves a delivery manifest. It includes explicit render confirmation, an estimate ceiling and resume support. It does not create the n8n editor draft or send the optional delivery webhook.
Install and check
Use Node.js 20.12 or newer. Extract the ZIP, open its shopify-product-ad-variants folder in a terminal and run:
On Windows PowerShell, use npm.cmd in place of npm for commands that forward options after --.
npm ci
npm run check
npm test
npm run offline
The offline command selects two test products and builds four concepts without credentials, network requests or credits. Its fictional records are for planner checks only. A separate real-sample fixture is available through npm run sample.
Copy .env.example to .env and fill in:
ZVID_API_KEY=YOUR_ZVID_API_KEY
SHOPIFY_STORE_DOMAIN=YOUR_STORE_PREFIX
SHOPIFY_ADMIN_ACCESS_TOKEN=YOUR_SHOPIFY_ACCESS_TOKEN
Use the Shopify token setup above and keep .env private. Edit config.json for your brand and selection. It starts with one product, one variant and one output. The script defaults to planning; the n8n dry-run switch does not control Node.js execution.
Plan, validate and render
# Read Shopify and save a plan without calling Zvid.
npm start

# Validate each concept and save the combined quote.
npm run validate

# After reviewing the quote, submit one paid batch.
npm start -- --mode render --confirm-render --max-credits 30
The example 30 is your chosen ceiling for the summed estimate, not a Zvid price or server-side spending guarantee. A missing or excessive quote stops submission. Raise it only after approving the planned batch.
For the demonstration input, use npm run sample, then npm run sample -- --mode validate. A paid reproduction is npm run sample -- --mode render --confirm-render --max-credits 30. The sample uses local product data, so it needs a Zvid key but no Shopify token for validation or rendering.
Open out/live/result.json for the plan, quote and saved batch ID. Completed runs also write delivery-manifest.json with video URLs and per-item failures, plus render-payload.json with the design and values. Open each successful videoUrl in your browser and download it. Sample runs use out/sample.
Recover an interrupted run
# Poll the saved live batch without submitting another batch.
npm start -- --resume

# Recover a sample batch from its saved directory.
npm start -- --resume --out out/sample
Resume uses the recorded input and bulk ID without re-reading Shopify or repeating rendering. If a network failure occurs before the submission response is saved, the script stops with an uncertain submission state. Check the Zvid dashboard before another attempt because the request may have been accepted. For a new intentional campaign, choose a new --out directory after reviewing the previous result.
If your data comes from a spreadsheet, the product video API tutorial covers the separate CSV mapping route.
Start with one reviewed ad
Import the JSON, connect credentials and select one product with dryRun: true. Check the preview and quote, render one concept and review its downloaded MP4. Then add a second angle and compare the two in your campaign.
For Zvid help, visit https://zvid.io/contact.
Frequently asked questions
Can I create Shopify product video ads without writing code?
Yes. Import the n8n workflow, install @zvid/n8n-nodes-zvid, connect Shopify and Zvid credentials, and edit Config. The optional Node.js companion runs the same planner and design from a script.
Does the Shopify ad workflow publish ads automatically?
It produces videos and a delivery manifest. With no delivery URL, it returns assets for review. An optional endpoint can receive the manifest, but your advertising or scheduling integration handles uploads, approvals, campaign settings and publication.
Why did two Shopify products create only two videos?
maxTotalAds caps the whole batch. Two products with two variants each need a value of four to produce all four concepts. The planner gives each product its first concept before adding another angle.
Why does my Shopify token work today but fail tomorrow?
Shopify client-credentials tokens expire after about 24 hours. Renew the token and update the n8n credential or SHOPIFY_ADMIN_ACCESS_TOKEN. Neither supplied route renews it automatically, so scheduled runs need an added renewal process.
Does the preview spend Zvid render credits?
No. The n8n dry run validates and saves an editor draft without rendering the batch. Node.js plan and validate modes also avoid paid rendering. Turning off n8n dry run or explicitly running the Node.js render command submits paid work.
Can I restart after a rendering timeout?
Check the existing batch first because a timeout does not cancel queued videos. In Node.js, use --resume with the saved output directory. In n8n, inspect the saved bulkId in Zvid and recover completed assets before another full execution.
Will this select my best-selling Shopify products?
It selects recently updated products matching your query, not sales-ranked bestsellers. Use tags or an upstream selection process to choose the campaign group, then align the product query and output caps with it.