Developer Tutorials
Video Template Validation: Preview Every State Before Rendering
Catch schema, data, and layout defects before render credits are spent with Zvid validation, template previews, edge-case data, and one test render.
By Mina RamzyPublished
Video Template Validation: Preview Every State Before Rendering
Video template validation should happen in three separate gates: validate the base project, preview the stored template with representative and edge-case variables, then inspect one real test render. Each gate catches a different class of defect. Schema validation finds invalid fields and plan-limit problems; template preview resolves placeholders, conditions, and iteration; the test render reveals visual and timing problems that structured checks cannot prove.
This workflow is for developers and production teams operating reusable video templates. It is deliberately narrower than debugging an invalid JSON request: the goal is to prevent a bad job from entering a production batch in the first place.
Treat validation, preview, and rendering as different gates
The three gates answer different questions:
| Gate | Question | Typical defects |
|---|---|---|
| Validate | Can the resolved project be accepted? | Unknown fields, invalid timing, unsupported formats, plan limits, unsafe URLs, layout warnings |
| Preview | What project does this data actually produce? | Unresolved variables, wrong types, empty arrays, pruned conditions, unexpected scene count or duration |
| Test render | Does the result look and move correctly? | Clipping, awkward wrapping, weak contrast, bad crops, dead time, broken transitions |
Do not collapse these into one “valid” flag. A project can pass schema validation and still produce the wrong number of scenes. A preview can resolve correctly and still look cramped with the longest approved headline.
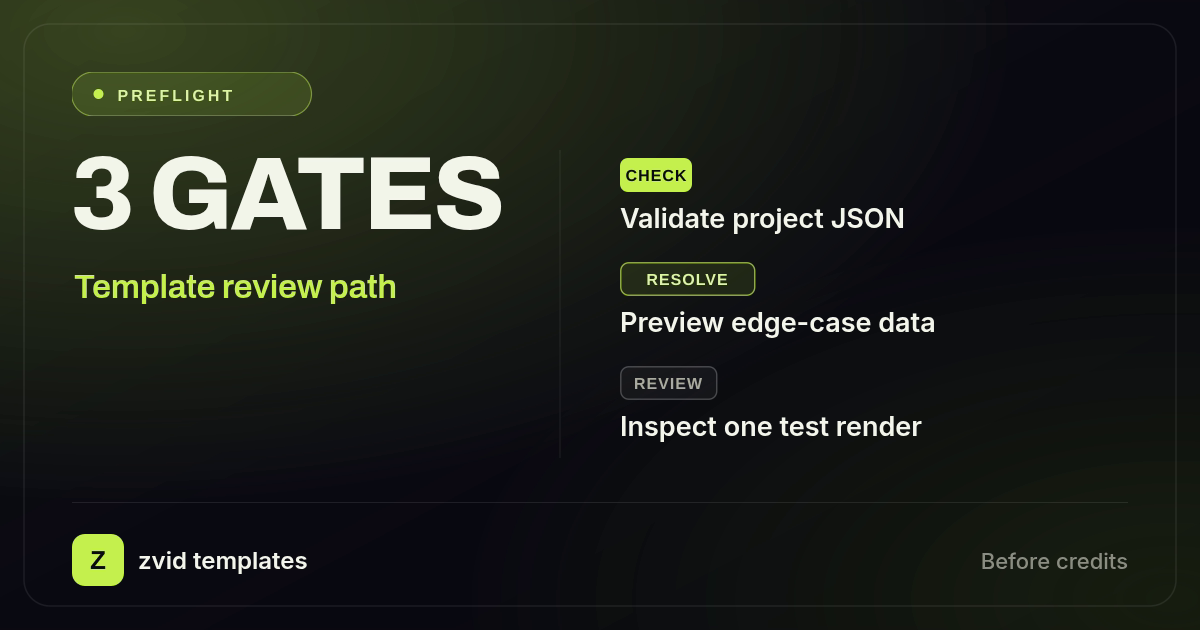
Validate the project, resolve edge-case data, and inspect one test render before production.
Start with a small template whose states are obvious
The example below represents a release-status video. It has a title, one repeated status scene per item, and an optional CTA. The defaults make the design understandable before an application supplies data.
{
  "name": "preflight-release-status-template",
  "resolution": "full-hd",
  "frameRate": 30,
  "backgroundColor": "#0B0F14",
  "outputFormat": "mp4",
  "variables": {
    "title": "August release status",
    "items": [
      { "label": "API", "value": "Ready" },
      { "label": "Editor", "value": "Ready" }
    ],
    "showCta": true,
    "cta": "Review the final render"
  },
  "scenes": [
    {
      "id": "intro",
      "duration": 3,
      "backgroundColor": "#0B0F14",
      "transition": "fade",
      "transitionDuration": 0.5,
      "visuals": [
        {
          "type": "TEXT",
          "text": "{{title}}",
          "position": "center-center",
          "width": 1400,
          "height": 260,
          "style": {
            "fontFamily": "Inter",
            "fontSize": "76px",
            "fontWeight": 700,
            "color": "#FFFFFF",
            "textAlign": "center",
            "display": "flex",
            "alignItems": "center",
            "justifyContent": "center"
          }
        }
      ]
    },
    {
      "id": "status",
      "iterate": "items",
      "iterateAs": "item",
      "duration": 3,
      "backgroundColor": "#0F172A",
      "transition": "fade",
      "transitionDuration": 0.5,
      "visuals": [
        {
          "type": "TEXT",
          "html": "<div style='font-size:30px;color:#5EEAD4;letter-spacing:4px;'>{{item.label}}</div><div style='margin-top:18px;font-size:88px;color:#FFFFFF;font-weight:700;'>{{item.value}}</div>",
          "position": "center-center",
          "width": 1200,
          "height": 320,
          "style": {
            "fontFamily": "Inter",
            "color": "#FFFFFF",
            "textAlign": "center",
            "display": "flex",
            "flexDirection": "column",
            "alignItems": "center",
            "justifyContent": "center"
          }
        }
      ]
    },
    {
      "id": "cta",
      "condition": "{{showCta}}",
      "duration": 3,
      "backgroundColor": "#0B0F14",
      "visuals": [
        {
          "type": "TEXT",
          "text": "{{cta}}",
          "position": "center-center",
          "width": 1400,
          "height": 220,
          "style": {
            "fontFamily": "Inter",
            "fontSize": "68px",
            "fontWeight": 700,
            "color": "#FFFFFF",
            "textAlign": "center",
            "display": "flex",
            "alignItems": "center",
            "justifyContent": "center"
          }
        }
      ]
    }
  ]
}
iterate repeats the status scene for each object in items. iterateAs makes the current object available as {{item}}. The CTA uses an explicit Boolean condition; Zvid does not evaluate business expressions inside condition. The dynamic-content guide documents these resolution rules, while template basics covers defaults, placeholders, and request-time overrides.
Save this project as a template in the editor or through the template API. Do not submit unresolved placeholders as an ordinary project render.
Validate the resolved base project first
Zvid's validation route accepts a render-shaped request without enqueueing a production render. In the commands below, ZVID_API_BASE is the API origin for your environment:
curl -X POST "$ZVID_API_BASE/api/render/validate/api-key" \
  -H "x-api-key: $ZVID_API_KEY" \
  -H "content-type: application/json" \
  -d '{"payload": {"name":"release-status-check","resolution":"full-hd","duration":3,"backgroundColor":"#0B0F14","visuals":[{"type":"TEXT","text":"August release status","position":"center-center","style":{"fontFamily":"Inter","fontSize":"76px","color":"#FFFFFF"}}]}}'
Treat every returned error and layout warning as a stop condition. Validation applies the caller's current plan limits, so do not hard-code a limit copied from another account. It also catches cross-field mistakes such as an exit time before an enter time or an incompatible output setting. If your application has its own input contract, validate that first and then map it into Zvid variables; the JSON Schema boundary pattern explains why those are separate contracts.
Preview a matrix of variable states
A stored-template preview resolves variables before validation. Call POST /api/templates/{id}/preview with the same variable shape that production will send:
curl -X POST "$ZVID_API_BASE/api/templates/tpl_xxxxxxxxxxxxxxxxxxxx/preview" \
  -H "x-api-key: $ZVID_API_KEY" \
  -H "content-type: application/json" \
  -d '{
    "variables": {
      "title": "August release status",
      "items": [
        { "label": "API", "value": "Ready" },
        { "label": "Editor", "value": "Ready" }
      ],
      "showCta": true,
      "cta": "Review the final render"
    }
  }'
The endpoint queues a preview and returns HTTP 202 when accepted. The preview endpoint reference is the source of truth for that contract.
For the worked example, the representative data resolves two iterations into four scenes and a 10.5-second timeline. An edge case with a long title, an empty items array, and showCta: false resolves to only the three-second intro. Those are illustrative records, not customer performance claims.
Use a compact matrix before approving the template:
| Case | Variables | Expected result |
|---|---|---|
| Representative | Two items, CTA on | Four scenes; title, two statuses, CTA |
| Long copy | Longest approved title and labels | No clipping or awkward wrapping |
| Minimum array | Empty items |
No empty repeated scene; timeline still makes sense |
| Maximum array | Largest allowed business case | Duration and scene count remain acceptable |
| Condition off | showCta: false |
CTA is removed, not rendered blank |
| Bad media | Unreachable or wrong-type URL | Preview or validation fails before production |
Iteration creates structure inside one video. It is different from bulk rendering, which creates multiple output jobs. If the next step is a batch, use the same approved matrix before following a high-volume bulk rendering workflow.
Use the editor for content fit, then automate the matrix
The Zvid Editor works on the same project JSON as the API. Its Variables panel can switch between raw placeholders and resolved values, preview the first iterated item, and show condition states. This is where a designer should approve hierarchy, copy limits, crops, and safe areas. The editor template guide shows that workflow.
After the contract is stable, move repeatable checks into code. Store the template ID and version beside a named fixture set. For every change, preview the representative, minimum, maximum, condition-off, and known-bad cases. Record the resolved scene count and duration so a structural change cannot hide inside a visually plausible preview.
Separate creative editing from the acceptance contract
An AI video app may help a content creator start from scratch, generate copy, animate a logo, or customize a pre-built graphic. A Pro editing tool may expose font, animation, motion, crop, opacity, and layer controls. You might also import an asset from Canva or Adobe, prepare a YouTube version, or download an editable video file for a client. Those content-creation choices are upstream of validation.
The acceptance contract should remain a reliable, static record of every input field, string property, component, and expected output. Define those expectations in fixtures and save each reviewer comment with the approved version. That custom approach lets a user update the design automatically without relying on the same editing tools, subscription, or device—including an Apple platform—on every run. AI can accelerate an edit; AI cannot replace deterministic checks, and an AI system should not decide whether a production render passed.
Render one production-shaped test and inspect the output
Preview is necessary, but it is not visual approval. Render one representative output and inspect the opening, middle, transition boundaries, and final pre-exit moment. Check the exact properties that matter to this template: text wrapping, card alignment, contrast, transition timing, and whether conditional removal leaves a coherent sequence.
A Zvid-rendered walkthrough of the validate, preview, and test-render gates. Its on-screen result object is an illustrative review record, not a promised API response schema.
Do not promote a template just because the job completed. A successful job proves that a file exists; it does not prove that the right copy is readable or that a transition feels intentional.
Make preflight failures boring
Use a simple policy in production:
- Reject invalid application data before it reaches the template.
- Reject every Zvid validation error or layout warning.
- Reject preview results whose scene count or duration differs from the fixture expectation.
- Reject visual defects in the representative test render.
- Version the approved template, fixtures, and review record together.
That sequence keeps retries and bulk operations downstream of a reviewed creative contract. When a failure does occur later, the staged approach in Debug Invalid JSON in the Zvid Video API helps isolate whether the problem is the request, media, render job, or delivery path.
Frequently asked questions
What is the difference between validation and template preview?
Validation checks whether a project is acceptable under the current schema and account limits. Template preview first resolves variables, conditions, and iteration, then validates the resulting project so you can inspect the actual structure produced by one dataset.
Does a successful preview mean the template is ready for production?
No. A preview proves resolution and validation for that variable set. You still need a production-shaped test render and a visual review for wrapping, crops, timing, contrast, and transitions.
Which variable cases should every template test?
At minimum, test a representative record, the longest approved copy, minimum and maximum arrays, every important condition state, and a deliberately invalid media or data case.
Run those fixtures through Zvid preview, fix every real issue, and approve one test render before connecting the template to production data.