Tutorials
Turn Blog Posts into Video Summaries with n8n
Turn the newest post in your RSS feed into a narrated, captioned video with n8n and Zvid. Check the source, preview costs, render and download, or use Node.js.
 By Mina RamzyPublished
Publishing a blog post gives you a finished story, but turning it into a short video still takes a script, narration, footage and captions. This blog post to video summary workflow connects those steps in n8n: read the newest RSS entry, fetch its article text, write a short summary and render a branded vertical MP4 with Zvid.
You keep the editorial review and choose where to publish. The workflow returns a video to watch and download; it does not upload it to social platforms. This guide follows the n8n template first, then provides a runnable Node.js alternative.
See what the workflow creates
36.4 seconds · 1080 × 1920 · voiceover and timed captions
Download the sample MP4 ↓
One source, a short video edition
The recorded example starts with the Google blog article Google Health: Evolving so you can focus on living better. It introduces the post, presents its main points with short headings and captions, then invites viewers to read the full article.
Your own run selects the newest entry in the feed you configure. Its title, script, footage and duration will change with that entry.
The design uses an introduction, three to five point scenes and a closing card. ElevenLabs supplies the narration and timing data; Zvid's stock library supplies relevant footage and optional background music. If a point has no usable clip, it becomes a moving text slide.
1. Get the workflow and prepare your accounts
Use the Zvid workflow page for this walkthrough.
Download the maintained JSON and use it for the written steps below. The companion setup guide explains the full configuration.
Watch the walkthrough
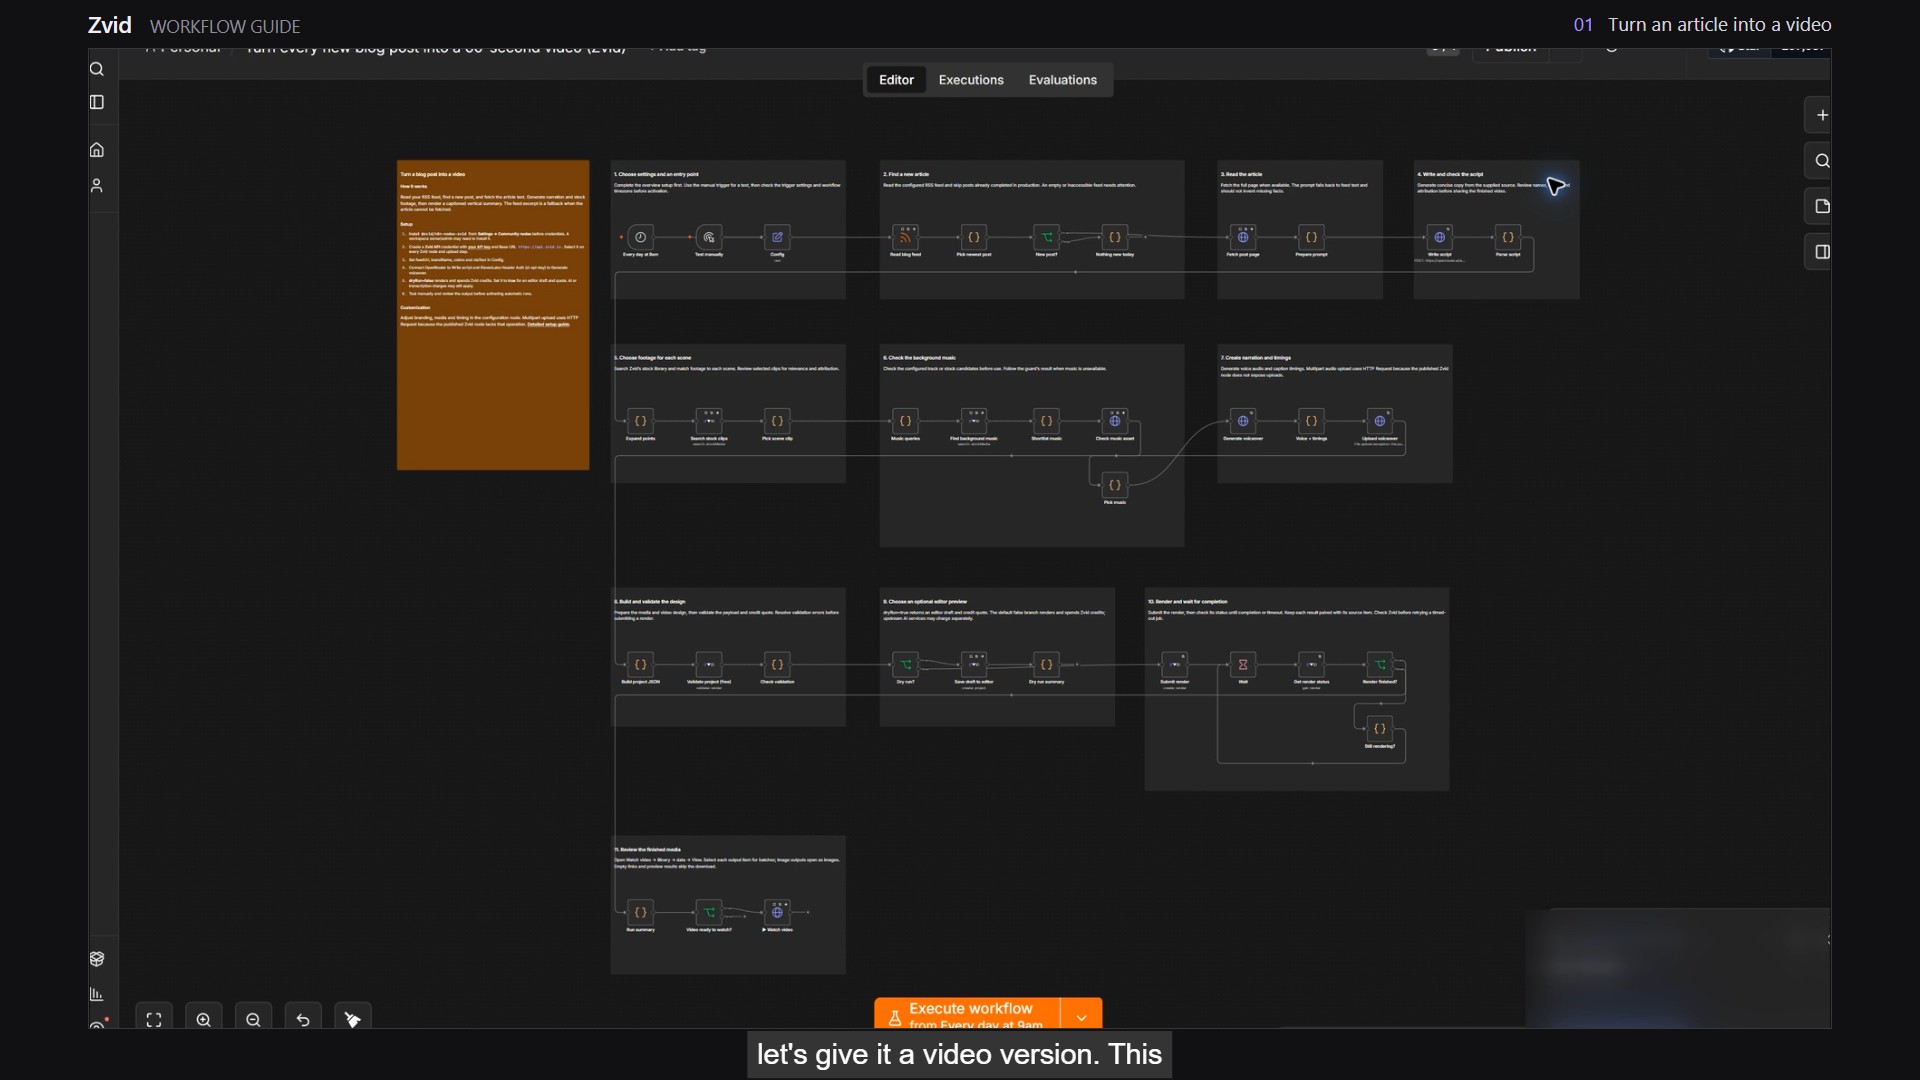
You need an n8n workspace where you can install the Zvid integration and create credentials, a Zvid account and API key, and OpenRouter and ElevenLabs accounts with access to the configured model and voice. You also need an RSS or Atom feed containing articles you are allowed to reuse. A feed is a machine-readable list of posts, rather than your ordinary blog homepage.
The shipped feed is https://blog.google/rss/, which is useful for checking how entries arrive. For your publishing workflow, use your own feed and content. A feed URL alone does not give permission to republish someone else's words, images or branding.
2. Install, import and connect credentials
In n8n, open Settings → Community nodes and install @zvid/n8n-nodes-zvid before configuring Zvid credentials. A workspace owner or administrator may need to install it. On n8n Cloud, use the verified Zvid node in the nodes panel if your workspace presents that installation route. See the Zvid integration guide.
Create an empty workflow, open its menu, choose Import from File and select blog-to-video.n8n.json. Keep the schedule inactive while you configure and test it.
Connect Zvid
- Sign in at app.zvid.io/api-keys, choose Create API key, give it a name such as
Blog summariesand copy the complete key while it is shown. - Open Validate project (free) in n8n and create a Zvid API credential. Paste the key and keep the base URL as
https://api.zvid.io. - Select that credential on Search stock clips, Find background music, Validate project (free), Save draft to editor, Submit render and Get render status.
- Open Upload voiceover and select the same Zvid API credential under Predefined Credential Type.
Keep the key in credentials, not in Config or the JSON download. The API key guide covers creating and replacing keys.
Upload voiceover uses HTTP Request because the published Zvid node does not expose multipart file upload. Supported Zvid search, validation, project and rendering operations use the community node.
Connect OpenRouter
Sign in to OpenRouter, open its API keys page and create a key. In Write script, create an OpenRouter credential, paste the key into API Key and save it. Keep the credential selected on that node. Your account needs usage allowance for the model in Config; the default identifier is openai/gpt-4.1-mini.
Connect ElevenLabs
In ElevenLabs, open Developers → API Keys, create a key and allow Text to Speech. Copy the complete key when it is created. In n8n, open Generate voiceover and create a Header Auth credential with Name xi-api-key and Value set to that key. Select it on the node.
Choose the voice through voiceId in Config. Start with the shipped voice if your account can use it, or substitute an available voice ID. An access or quota error is a reason to check the account before retrying. See ElevenLabs' API-key instructions.
The workflow does not renew API keys, replenish quotas or recover access to a removed model or voice. Replace a revoked or expired key in its credential before scheduling more runs.
3. Choose one article and check the source
Open Config and change these values for your first test:
| Setting | Shipped value | First-run choice |
|---|---|---|
feedUrl |
https://blog.google/rss/ |
Your RSS or Atom feed |
brandName |
Fieldnotes |
The name shown on your video |
ctaText |
Read the full post |
Keep it for the first test |
targetSeconds |
60 |
Keep it as a narration target, not a fixed duration |
maxPromptChars |
4000 |
Maximum article characters sent to the writer |
brandColor / brandAccent |
#0F1626 / #FFB454 |
Keep the sample palette initially |
dryRun |
false |
Change to true before the preview run |
Select Read blog feed and choose Execute step. Inspect its output before executing the whole workflow. A usable feed has entries with titles or links. Pick newest post sorts dated entries and selects only the newest one. It does not process the whole archive or collect every post published since the previous run.
Execute through Prepare prompt and inspect articleSource and promptText. Fetch post page attempts to read the linked article; if it fails or provides little text, the workflow uses the feed text. articleSource: page means the richer page text was selected; feed means the fallback was used. Both are capped at maxPromptChars.
Check that the selected text contains the points you want summarized. If it does not, fix the feed content or choose a suitable source before paying for narration. The writer is instructed to use the supplied facts, but it does not independently fact-check them.
4. Preview and check the estimate
With dryRun: true, choose Test manually and execute the workflow. This run writes the script, generates one narration request, uploads its audio, builds the video and validates it. It follows Save draft to editor → Dry run summary instead of Submit render.
Inspect Parse script for the hook, point sentences, short on-screen labels and closing line. Check names, facts and whether the summary represents the original article. The script must contain three to five usable points and enough words for the target; an invalid or very short response stops before rendering.
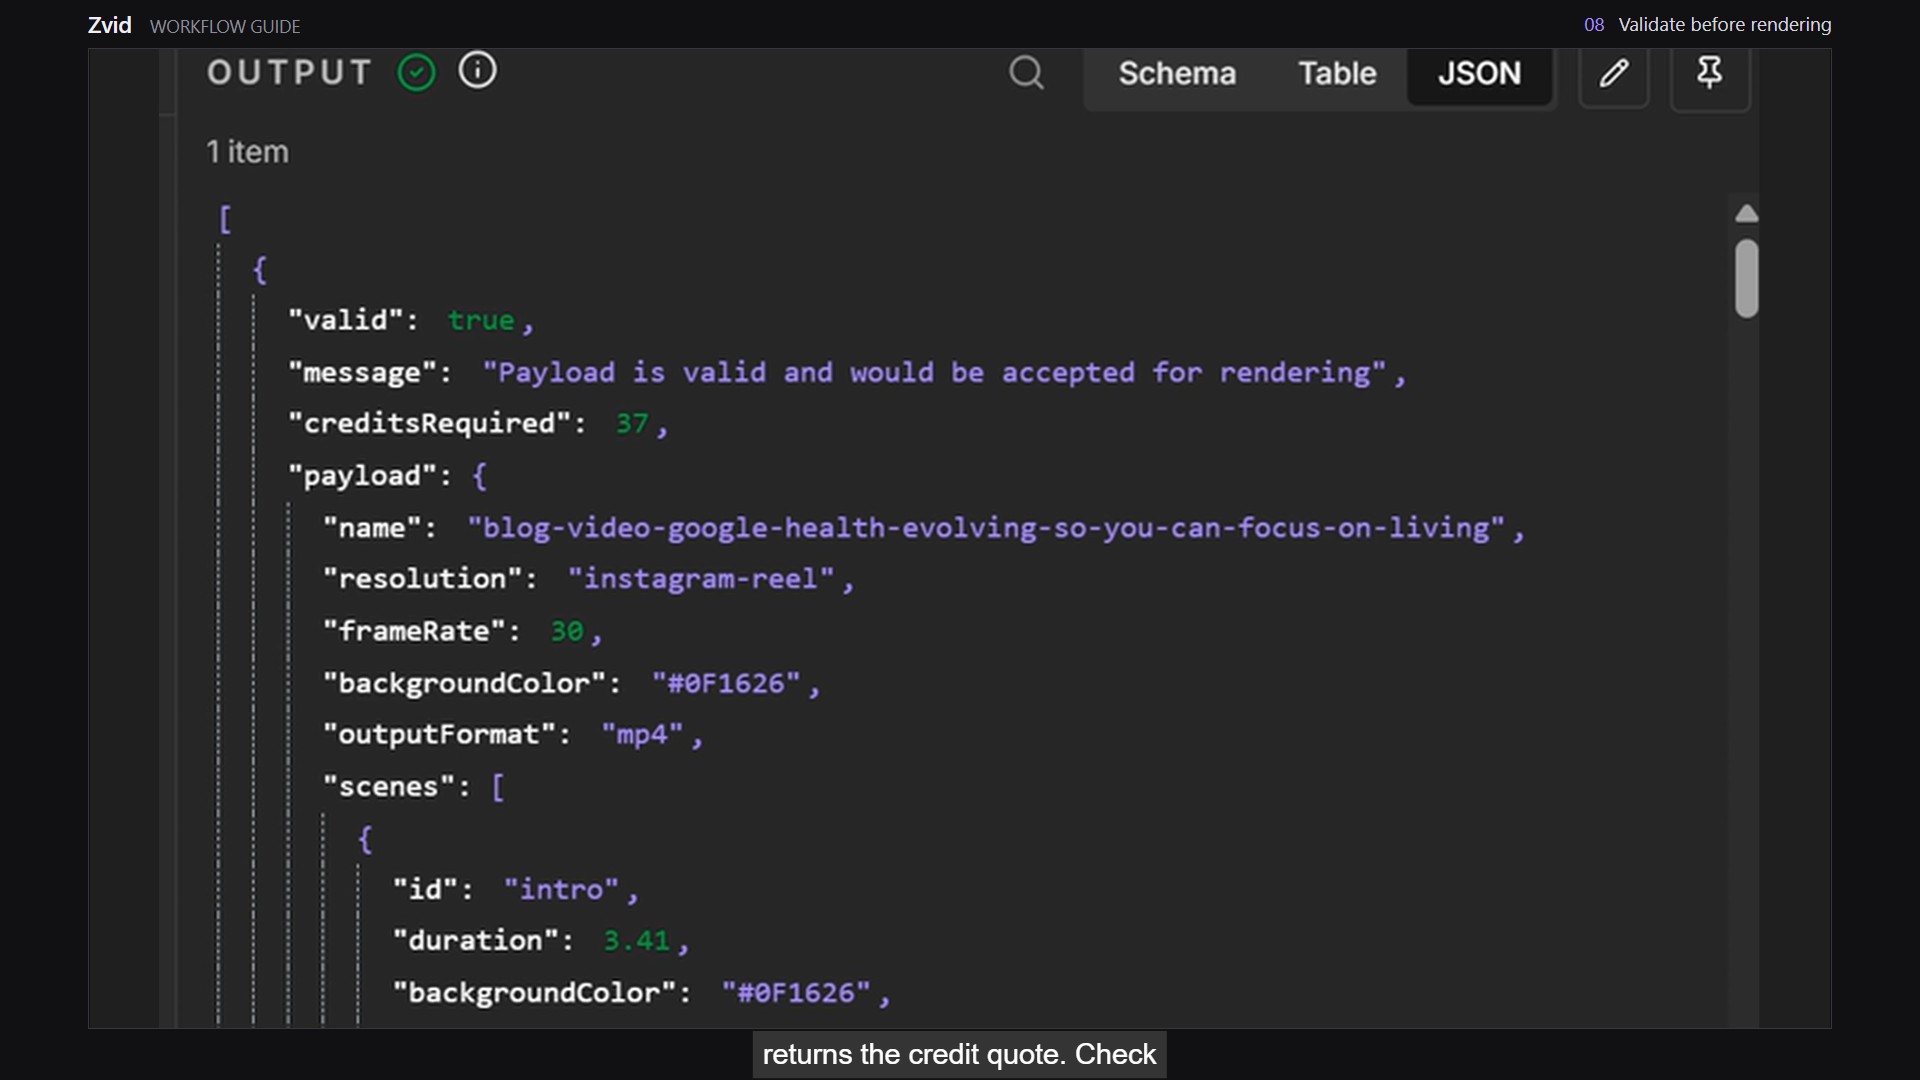
In Dry run summary, check creditsRequired, videoSeconds, articleSource, warnings and editorLink. Open editorLink while signed in to Zvid and play the draft. Watch every scene, listen to the narration and check the captions. The editor preview guide explains playback and scrubbing.
Saving the draft is best-effort. If editorLink is empty, inspect Save draft to editor for an account, project-limit or request error. A successful validation does not prove that a draft was saved.
Zvid validation and the editor preview do not consume render credits. The upstream script and speech services have already run, so this is not a zero-cost test of the entire workflow.
5. Render, watch and save
After reviewing the design and your credit allowance, change dryRun to false and run manually. Validate project (free) checks the new project before Submit render creates the job. Save the returned jobId with the n8n execution.
A new full execution generates a new script and voiceover. Switching the setting and running again does not render the exact editor draft from the previous preview. The newest feed entry may also have changed. Check the source and completed result again. To retain an exact prepared input for approval, use the Node.js prepared-render route below or add an explicit review-and-resume step to n8n.
The workflow checks Get render status until completion. The defaults are a ten-second interval and a twenty-minute timeout. A failed job stops with its reason. A timeout does not prove that the render failed: inspect the saved job in Zvid before submitting another one.
When Run summary returns rendered: true and videoUrl, open ▶ Watch video → Binary → data → View. Play the whole MP4, then use the download control to save it. Video ready to watch? gates the download so preview results and missing URLs skip it.
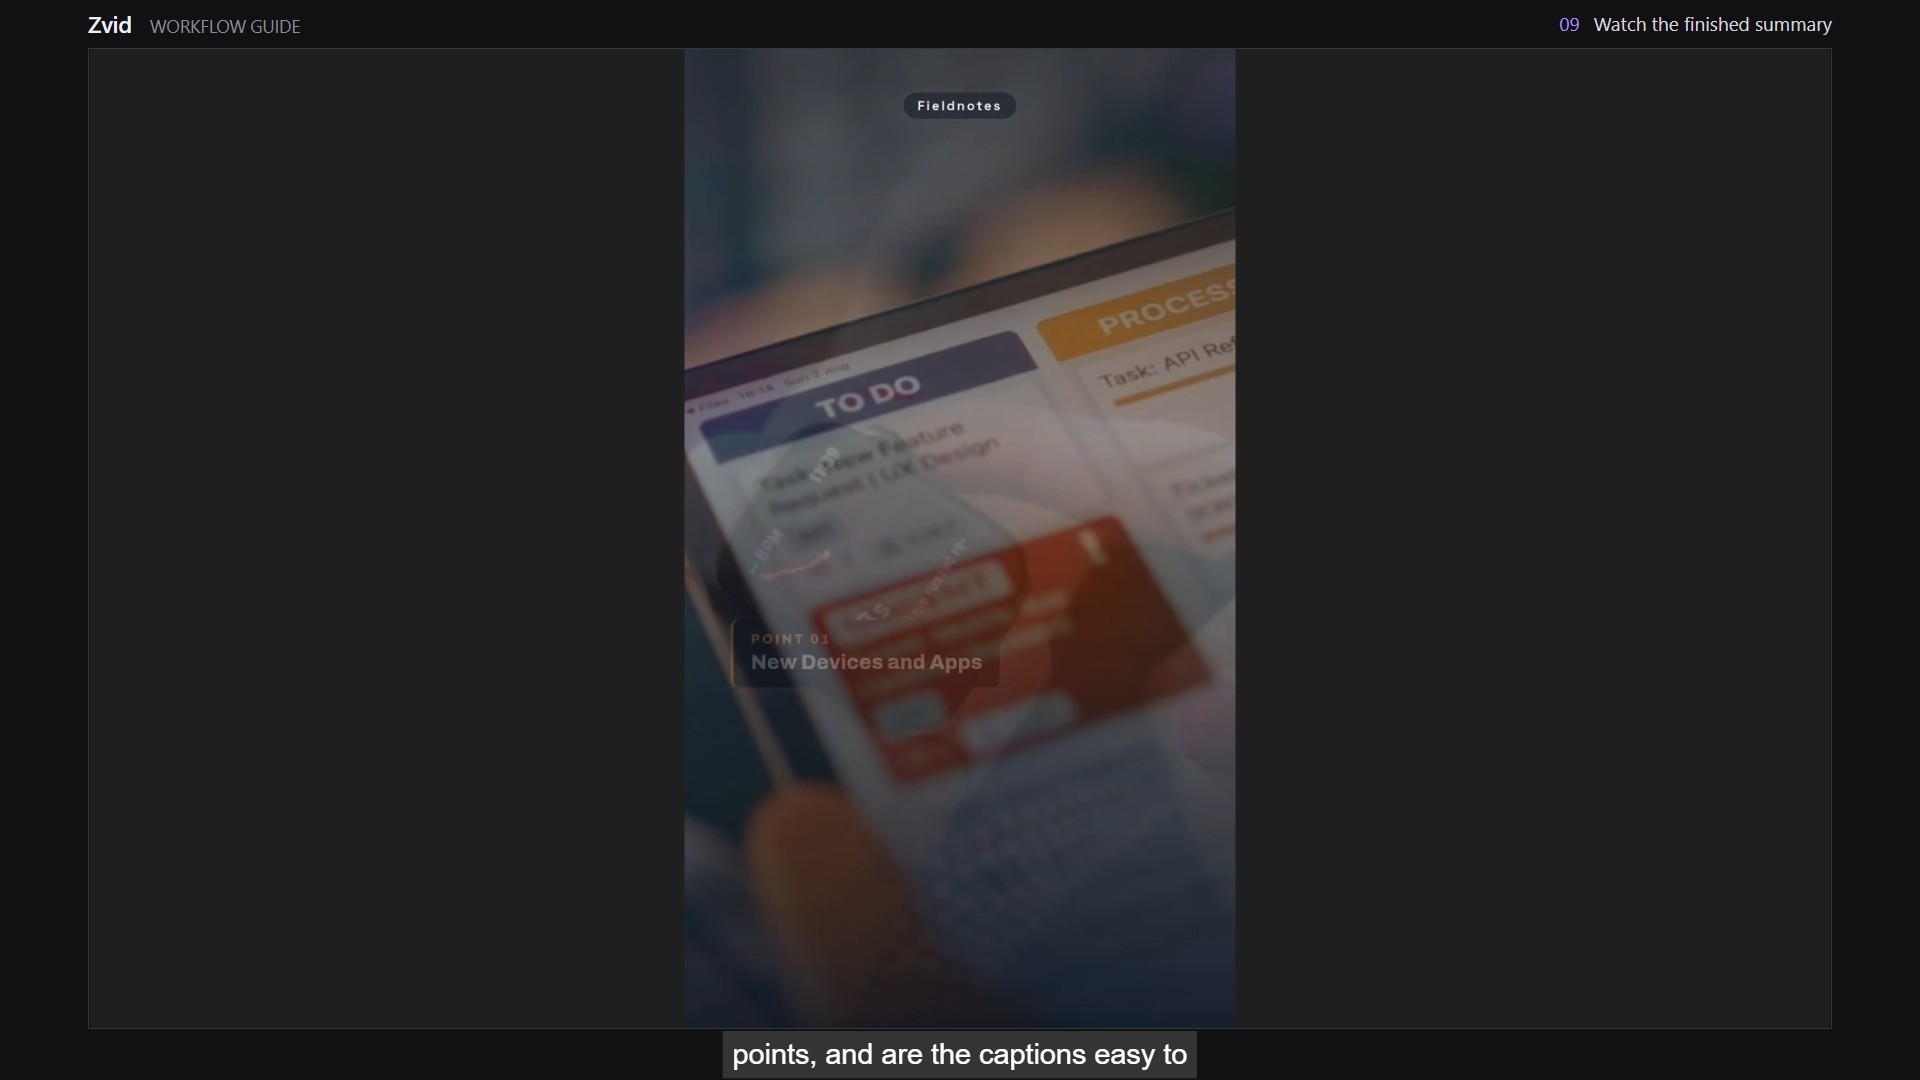
If the binary download fails just after completion, use the existing videoUrl or retry the download node. Do not run the whole workflow merely to download the same result. Save the MP4 to storage you control because render output links have limited availability. See media URLs and output files.
The summary field named creditsCharged copies the validation quote. Use your Zvid credit history when you need the actual account transaction.
6. Review and publish the result
Download the approved MP4 and upload it through your normal publishing process. Add the full article link in the post description, caption or another supported link location. The domain displayed inside the video is text; it is not clickable.
The supplied workflow has no social-upload node and no publishing approval gate. Its handoff is the completed MP4 and source article link. Before sharing it, check that footage is relevant, narration does not overstate the source and any required attribution is included.
If you add an upload branch, keep a durable record of the render job and destination's published ID. Use it to retry a failed upload without rendering or posting the same video twice.
Customize, then enable the daily schedule
Change one thing at a time after the first result. Use your brand name, colors and call to action. Change voiceId for a voice you can access. The supplied writing prompt produces English; changing language alone does not translate the script. captionWordsPerCue controls caption grouping; the template limits it to twenty words per cue.
Stock footage is illustrative. A query such as “person walking outdoors” is easier to match than an abstract phrase. Without a usable clip, a point becomes a text slide. Unreachable or oversized music candidates are skipped so the video can proceed without a background track.
For scheduling, open Every day at 9am and set your preferred time. In workflow settings, choose your timezone explicitly. Save and publish or activate the workflow using the controls in your n8n version. The n8n Schedule Trigger documentation explains workflow and instance timezones.
Keep these limits in mind:
- Only the newest entry is selected. If several posts arrive between runs, older ones can be skipped. Use a queue-based design when every post must be processed.
- Manual tests can repeat the same post. The last-post marker persists during successful production executions rather than manual testing.
- The memory is one GUID, not a complete history. Feed reordering, unstable IDs and concurrent runs need additional handling. An article edit with an unchanged GUID does not automatically create an updated video.
- A failed render remains eligible. The completion marker is only written after success. Inspect the existing execution and job before allowing a retry.
For a controlled queue with a visible completion status, the Google Sheets quote-video tutorial shows a different input-and-status workflow.
Costs and practical limits
There are three usage meters: OpenRouter for writing, ElevenLabs for speech and Zvid for rendering. Your n8n hosting or plan may also have charges. Set service usage limits and keep the schedule inactive until you understand a single run.
At 1080 × 1920, Zvid charges one credit per second of resolved duration, rounded up. The 36.4-second sample was quoted at 37 credits. A sixty-second output at that resolution would be 60 credits, but targetSeconds: 60 is a writing target. Actual narration determines timing and output length. Read the current Zvid credit rules and use the quote for your own payload.
Validation does not reserve render credits. Submitting the render reserves them; Zvid refunds failed or cancelled renders according to its credit rules. This does not refund a separate script or speech request.
The source-text limit, three-to-five-point format and automatic footage selection suit short summaries. The workflow is not an archive importer, a fact-checking system or an exact-duration editor. Review the original article, generated wording and final video whenever accuracy matters.
Prefer Node.js?
The companion uses @zvid/sdk and the same selection, script-parsing, caption-timing and video-building logic as the n8n JSON. It can read your RSS feed, prepare a preview, render one video and download it locally.
Its included sample uses the same source topic and retained narration as the video above, with the workflow's text-slide layout in every point scene. Watch the companion's text-slide sample. The walkthrough shows the earlier stock-footage version. This makes the no-footage fallback reproducible without running new writing or speech requests.
Use Node.js 20.19 or later. Extract the ZIP, open a terminal in the project folder containing package.json, then run:
npm ci
npm run check
npm test
npm run offline
On Windows PowerShell, use npm.cmd if your execution policy blocks the npm wrapper. These commands check the files and prepare the retained example locally. They do not call generation services or render a new video.
Copy .env.example to .env and fill in ZVID_API_KEY, OPENROUTER_API_KEY and ELEVENLABS_API_KEY using the credentials described above. Keep the file private. Edit config.json with your feed and branding, then prepare a live preview:
npm run dry-run -- --allow-generation
--allow-generation acknowledges separate OpenRouter and ElevenLabs usage. This saves out/live/prepared.json, validates it and prints an editorLink with creditsQuoted. The speech call requests one take and is not automatically retried.
After reviewing the draft, render the saved project with an explicit Zvid credit ceiling:
npm run render-prepared -- --max-credits 60
Unlike rerunning n8n, this reuses the saved script, audio and project. It validates again and refuses to submit above the ceiling. That ceiling covers Zvid rendering only, not earlier writing or speech costs.
The command records submission state and the job ID in out/live/state.json, waits and downloads out/live/video.mp4. If waiting or downloading is interrupted, recover that job without another paid submission:
npm run resume
If the saved state says submitting but has no job ID, inspect Zvid before retrying; the server may have accepted the request before the connection failed. An expired output cannot be recovered by polling again.
The script has no built-in schedule or social publishing. It remembers the last completed live post in out/feed-memory.json. Keep that file, run one scheduled instance at a time and choose a new output folder for each new job. The source README includes sample and recovery commands.
Start with one post
Import the workflow, connect the three credentials and inspect one feed entry. Use dryRun: true to check the script, draft and quote, remembering that writing and speech can still charge. Watch the first finished MP4 and publish it manually before enabling the schedule.
Frequently asked questions
Can n8n turn a blog post into a video summary automatically?
Yes. This template reads the newest RSS or Atom entry, summarizes its available text, generates narration and renders a vertical video with Zvid. Configure the credentials and feed, then review the result before publishing it.
Does setting dryRun to true make the whole workflow free?
No. dryRun: true skips the Zvid render, but OpenRouter and ElevenLabs run before the preview branch and can charge for the script and narration. Zvid validation and editor preview do not consume render credits.
Does the blog-to-video workflow read the full article?
It attempts to fetch the linked article and uses that page text when it is meaningfully richer than the feed excerpt. Otherwise it uses the feed text. maxPromptChars limits the selected text, so inspect articleSource and the prepared prompt before relying on the summary.
Why does a manual n8n run render the same post again?
Manual tests do not persist this template's last-post marker in the same way as successful production executions. It can therefore select the same newest post again during testing. The marker stores only one completed GUID, so it is not a full duplicate-history system.
Will the rendered video match the editor draft exactly?
A new full n8n execution generates a new script and voiceover, so it may differ from an earlier draft. The Node.js companion's render-prepared command revalidates and renders the saved project without regenerating its narration.
Does this template publish to YouTube or Instagram?
No. The supplied workflow returns the completed MP4 and source article link. Upload the downloaded file through your publishing process, or add a destination branch with its own review and duplicate controls.
What should I do if the render times out?
Inspect the saved jobId in Zvid before submitting another render. A timeout means the workflow stopped waiting. Download a completed job's existing result or inspect the failure reason. The Node.js companion resumes a saved job with npm run resume.
For Zvid help, visit https://zvid.io/contact.